Description
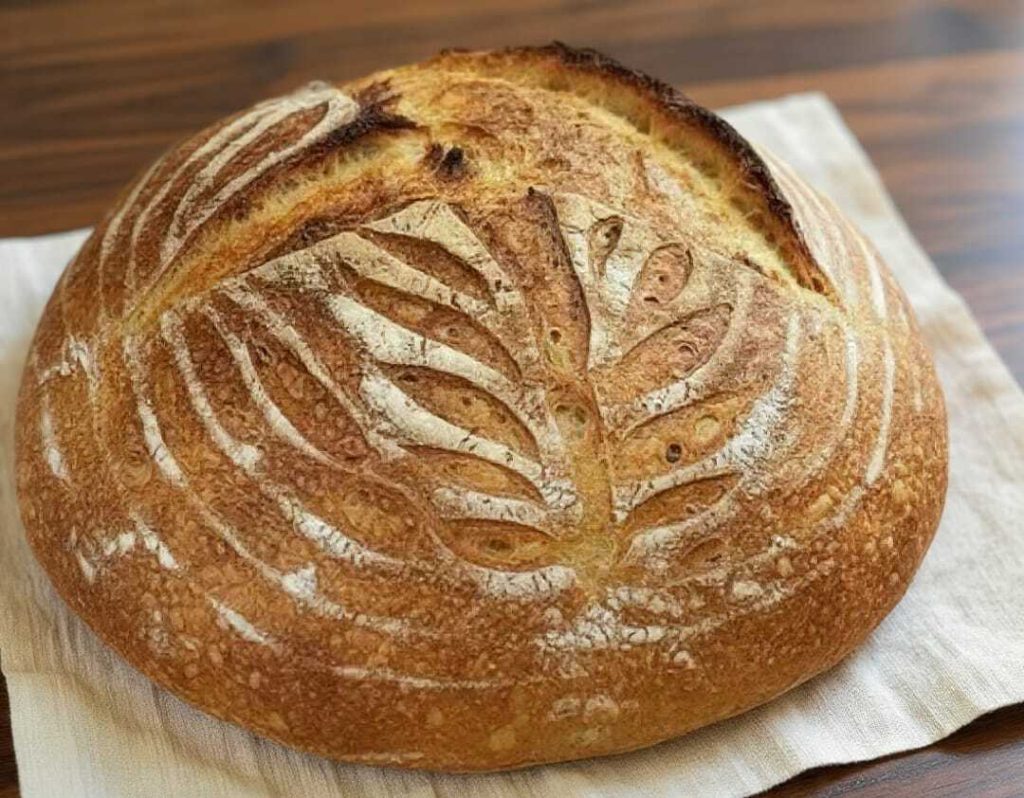
Keto sourdough bread is the answer for anyone who misses the soul of traditional bread while staying committed to a low-carb lifestyle. This rustic loaf captures everything we love about classic sourdough — the crackly crust, the deep golden color, the subtle tang, and the satisfying chew — without wheat, sugar, or high carbohydrates.
Unlike quick keto breads that rely heavily on baking powder and eggs, this recipe uses a keto sourdough starter made from almond flour and psyllium husk you can the recipe for the starter as wel just click here keto sourdough starter . The result is a loaf that looks, smells, and feels like real artisan bread. Slow fermentation enhances flavor, improves texture, and makes the bread easier to digest.
This bread is not meant to mimic fluffy sandwich bread. It is intentionally rustic, hearty, and crusty — perfect for slicing, toasting, dipping in olive oil, or serving alongside soups and stews. Every loaf feels handmade, intentional, and deeply satisfying.
My Real Experience With This Recipe
I’ll be honest — bread was one of the hardest things for me to give up.
When I started losing weight (I was around 120kg), I could manage meals… but living without roti, naan, or bread felt almost impossible.
I tried a lot of “keto bread” recipes:
- Some tasted like eggs
- Some were too dry
- Some didn’t feel like bread at all
Then I got interested in the idea of sourdough — not for strict keto reasons, but because of the flavor and digestibility.
Of course, traditional sourdough uses flour, so I had to adapt it.
After a few experiments, I created a version that:
- Has a slightly tangy, fermented taste
- Feels more like real bread
- And still stays low in carbs
It’s not exactly the same as traditional sourdough — but it’s the closest I’ve personally achieved while staying low-carb.
Why This Keto Sourdough Works
- Naturally fermented keto starter for authentic sourdough flavor
- Crispy crust with beautiful artisan scoring
- Dense yet tender crumb that slices cleanly
- No wheat, no yeast packets, no sugar
- Oven-spring and structure without gluten
Servings: 12 slices | Prep Time: 25 minutes | Cook Time: 55–60 minutes
Ingredients
For the Keto Sourdough Starter (Active)
- ½ cup almond flour
- 1 tablespoon whole psyllium husk (not powder)
- ½ cup warm filtered water
(Starter should be bubbly and lightly sour before use.)
For the Dough
Dry Ingredients
- 2 cups almond flour (fine, blanched)
- ¼ cup coconut flour
- ¼ cup whole psyllium husk
- 1 teaspoon sea salt
Wet Ingredients
- 1 cup warm water
- 2 tablespoons olive oil or melted butter
- 1 teaspoon apple cider vinegar
Instructions
1. Activate the Starter
Your keto sourdough starter should be active and bubbly, with visible air pockets and a mild sour aroma. Feed it 4–6 hours before baking if needed. This fermentation step is what gives the bread its signature flavor.
2. Mix the Dry Ingredients
In a large mixing bowl, whisk together almond flour, coconut flour, psyllium husk, and salt. Ensure the psyllium is evenly distributed to prevent clumping.
3. Add the Wet Ingredients
Add the active keto starter, warm water, olive oil, and apple cider vinegar. Stir with a sturdy spoon or spatula until a thick dough forms. The dough will hydrate and firm up as the psyllium absorbs moisture.
4. Knead and Shape
Using damp hands, gently knead the dough for 2–3 minutes until smooth. Shape into a round boule. The dough should be firm but pliable, not sticky.
5. Fermentation (Bulk Rise)
Place the dough into a bowl lined with parchment or a clean kitchen towel. Cover loosely and let ferment at room temperature for 8–12 hours. The dough will not double like wheat bread but will develop structure and aroma.
6. Preheat the Oven
Preheat your oven to 425°F (220°C). Place a Dutch oven or heavy oven-safe pot inside to heat for at least 30 minutes.
7. Score the Dough
Transfer the dough onto parchment paper. Dust lightly with almond flour. Using a sharp blade, score a decorative leaf or cross pattern on top. This allows controlled expansion during baking.
8. Bake
Carefully place the dough (with parchment) into the hot Dutch oven.
- Bake covered for 40 minutes
- Remove lid and bake another 15–20 minutes until deeply golden
The crust should sound hollow when tapped.
9. Cool Completely
Allow the bread to cool on a wire rack for at least 1 hour before slicing. This step is essential for proper crumb structure.
Texture & Flavor Notes
This keto sourdough has:
- A crusty exterior with rustic blistering
- A moist, slightly chewy crumb
- Mild tang similar to traditional sourdough
- Excellent toastability without crumbling
| Nutrient | (Per Slice – Approximate) |
|---|---|
| Calories | 140 |
| Total Fat | 11g |
| Total Carbs | 6g |
| Protein | 5g |
| Fiber | 4g |
Mistakes I Made (Very Important)
❌ Didn’t let it cool → sticky inside
❌ Used too much psyllium → rubbery texture
❌ Skipped resting time → poor structure
✔ Biggest lesson: patience = better bread
Pro Tips for Best Texture
- Use fine almond flour (not coarse)
- Measure psyllium carefully
- Let it cool completely before slicing
- Toast slices for better taste
Variations You Can Try
1. More Tangy Version
Add a bit more yogurt or let batter rest longer
2. Seeded Bread
Add sunflower or flax seeds
3. Soft Roll Version
Shape into buns instead of loaf
How I Use This Bread
This is where it becomes practical:
- Breakfast with eggs
- Chicken sandwiches
- Toast with butter
👉 Makes keto feel sustainable.
Real Talk (Important)
No keto bread is exactly like real bread.
But this gets close enough to:
👉 Satisfy cravings
👉 Keep you consistent
And that’s what matters.
FAQs
Is this real sourdough?
No — it’s a low-carb version inspired by sourdough flavor.
Why is my bread purple?
That can happen with psyllium — it’s normal.
Can I skip psyllium?
Not recommended — it’s key for structure.
How long does it last?
2–3 days at room temp or longer in fridge.
Serving Suggestions
- Toasted with butter or ghee
- With avocado and flaky salt
- Alongside soups and stews
- As a base for keto bruschetta
- Dipped in olive oil and herbs
Storage & Freezing
- Store wrapped at room temperature for 1 day
- Refrigerate up to 5 days
- Freeze sliced for up to 2 months
- Toast directly from frozen for best texture
Pro Tips for Success
- Use whole psyllium husk, not powder
- Let the loaf cool fully before cutting
- Do not rush fermentation — flavor develops over time
- A Dutch oven is essential for crust formation
- Humidity affects dough — adjust water slightly if needed